Creating Normal Maps
- Oct 12, 2020
- 4 min read
Since a lot of detail needs to be added to our models, normal maps are the easiest way to achieve this. Normal maps are textures that are designed to add more depth to a model without upping the poly count of the model they're applied to.


As a quick exercise in modelling, we looked at keeping the poly count down while also maintaining the shape of the model. We set our preferences to have the sizing scale be in metres to create a door. This is essentially a very easy way of creating a door, which I can use the method of when modelling one myself.
I created a cube, and sized it up to be 2 metres all, and thinned it down before centering it on the grid line. Right now, if I smooth this cube, it will lose all it's shape and turn into an oval. To fix this, I can either bevel the edges of the cube, or I can add in edge loops.


Before I do this, I need to turn this cube into a door. I did this by selecting the front and back faces, and adding an offset to them. I then selected these two faces and extracted them from the rest of the shape.


With the two faces as a separate, I selected all the edges and bridged them together. I did the same with cut-out geometry, which will act as a doorframe.


With the door more complete, it was time to add in bevels and edge loops. I tried out adding edge loops, as I don't usually used those. I thought it was a good way to keeping an object's shape, although the amount of geometry it added was a lot.


I bevelled it instead, which had the same results with less faces. I then opened the UV menu, and selected automatic UVs. This is so that I don't have to spend too much time on correcting the UVs.
I took a UV snapshot of the doors, and saved it as a PNG.


I loaded the PNG UV snapshot into Photoshop to create a normal map. Usually, this would be done in Substance Painter, but it can be done in Photoshop as well. I found a simple wood texture to use on the door. I duplicated it over to the other door.


I added a 50% grey on a layer behind the textures, merged all the layers, and then went into the Filter menu, and selected 3D, and then 'Generate Bump Map.' This brings up the previous and settings menu. I inverted the map before trying out some of the different previews, which can be anything from a sphere to a cube to a ring. Clicking OK gives me a layer that can be used as a normal map, so I saved it as a PNG.


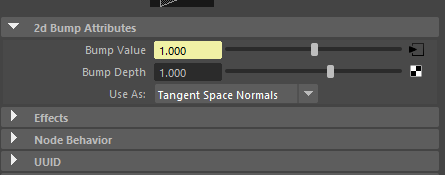
I then applied it to the door in Maya, and selected the Tangent Space Normals option on the drop-down menu.


Here's how the door looks with a normal map applied. Although there is no change on the surface of the model, the normal map makes it look like it has a lot of intricate detail.

It was now time to do the same for the frame, which meant I had to check the UVs and take a snapshot.


I had a bit of fun texturing this door, and I could give it a quick name. I used the same wood texture for all the sides of the frame, but moved them around them a bit so they weren't completely identical.

Here's how the normal map for the doorframe looks so far.


I went in to make more changes after checking how it looked in Maya. The UV map of the doorframe is upside-down in some places, so I rotated the text around to place it on the bottom of the doorframe instead. I also cut down the excess wooden planks that overlapped with the vertical planks. All of these were kept as a group, so it was easy to use the marquee tool to delete them.


Here's how the normal and texture maps look now. Since this is only a quick exercise, I didn't need to go into extreme detail, so I left it as is.


I applied the textures and normal map to the frame before going back to the door. I decided that I wanted to add more detail, so I found some medieval door hinges in the shape of a snake to use. I used these on both the front and back. I flipped the them over to put on the other door, as this UV is upside-down as well.


Here are the normal and texture maps of the door.


I applied them to the models in Maya. To apply the texture on top of the normal map, I clicked 'colour' and selected the texture. This has been a god exercise to have had. I've previously learned about normal maps, but I hadn't had the chance to use them in my previous year at Nescot.
This will definitely be useful if I ever need to quickly check my textures in Maya, as I can just use Photoshop to quickly create normal and textures for my models.


Comments