Nuke - Introduction
- Feb 26, 2021
- 4 min read
Updated: Mar 3, 2021
Over the course of the second VFX Unit of this course, I'll be using the programme Nuke to create a showreel of our work this year. This also gives me the opportunity to revisit a programme I briefly used during the first year of NextGen, and haven't had any other opportunities to experiment with.
I was set a simple 'warm-up' task to perform in Nuke, which was to create a simple scene and animate it with still images.
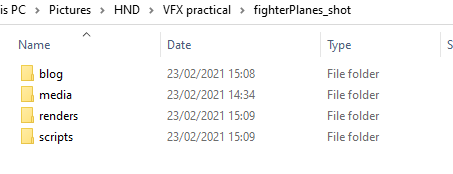


The first thing to do was to set up a folder for the project. This required me to create multiple folders inside of it, each to hold a different part of the project. The media folder is where any footage and images go, scripts is where the Nuke files are saved, and renders is where any frames or videos are rendered out to. The blog folder was something I added to keep my screenshots of this project close by.
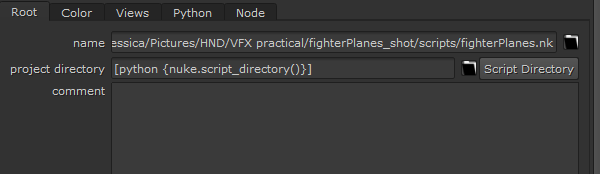
With the folder set up, the next step is to create a new Nuke project. I directed the saving of the project to the project file I set up, and saved the composition in the scripts folder.
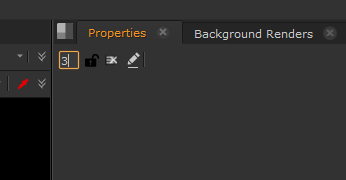


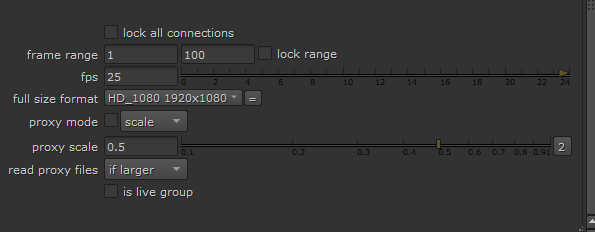


A quick tip I got from the video tutorial I was following was to limit the amount of windows I could have open inside properties panel. This will reduce lag that may arise later. I also made sure the resolution was 1080, and changed the frame rate to 25 fps.


With the setting up out of the way, I imported a still image of a plane into the project. This will be duplicated and animated later, but first I needed to set up and familiarise myself with a few things in Nuke. Nuke works in nodes that can be used to connect various different processes and assets together. Attaching the plane to the viewer means the plane is now visible in the scene.


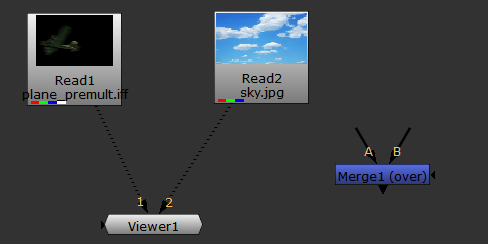


I imported the sky image as well, and attaching it to the viewer as well. I then pressed tab and searched for a merge node, which allows me to merge two images into one sequence by attaching them to it. The pipes attaching them together are also numbered, which corresponds to the keyboard. Depending on which number I press, the viewing panel will show me either the plane, the sky, or the viewer (i.e. both of them together thanks to the merge).


With a growing amount of nodes in the node graph, so I need to organise them out. This is done in Nuke by designating one pipe as the 'spine' of the script, with everything else attached to it. So I spent a few minutes just straightening out all the nodes on the graph.


Once I'd set up the nodes to be more readable, I added in a transform node and attached it between the plane image and the merge node. Doubling clicking on it allows me to transform the plane, meaning I can move it across the scene. I can also size it up and down and chose where to position it. For the moment, I sized it down and placed it in the upper right corner.


In the scene, I want more than one plane, so I copy and pasted the nodes and then attached them to the pipe. Now there are two planes in the scene, so I quickly moved that into the scene and sized it up somewhat.

I made sure to change which merge node was attached to the viewer, as the scene wouldn't be visible if the second merge wasn't the one attached.


I then went through this process again, adding another plane to the scene. This plane is the largest, and also in front of both the others because of how the node graph has been set up.


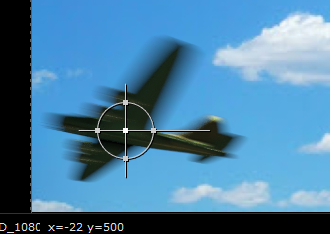
It was now time to start animating them, which meant I had to double click on the transform menus to open them. In the translate menu, I clicked the squiggly line, which gives me the option to start setting key frames. I moved the plane completely off screen and then set that position as the first key frame.


I then moved the timeline forwards and dragged the plane across the sky. I opened the dope sheet, which gives me a move in-depth timeline, and moved the last key frame forwards a little to speed up the animation.


I then did the same with the other two, decreasing the time which they took to travel across the screen. Once the animations were done, I opened the merge menus and made sure the viewer was set to only pick up frames within the the 1080 size. This means that when it is rendered out, the scene will stay the same size, as the planes go off screen and used to expand the size of the viewer.


With this complete, I tried out a few labelling methods, such as sticky notes and backdrop nodes, which can be used to colour code and label different parts of the node graph. This was a good way to differentiate different sections of the graph, as these can get quite big and complex.

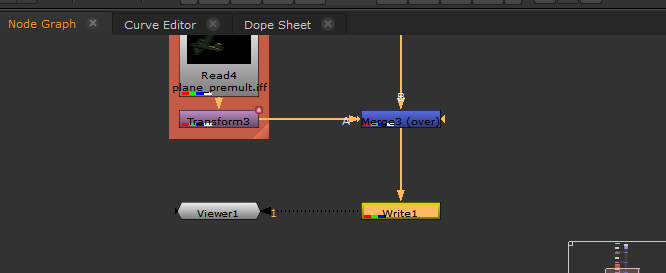


The final thing to do is write it out of Nuke, which is how things are rendered out of Nuke. I attached the viewer to the write node, and then double clicked on it to open it. I then chose a place for the files to render out to.
Since I'm rendering out in .exr, I have to pad the frames. This is so they're correctly ordered when they're rendered out. This is done by adding hashtags accordingly. The industry standard is four digits, so that's what I went with.


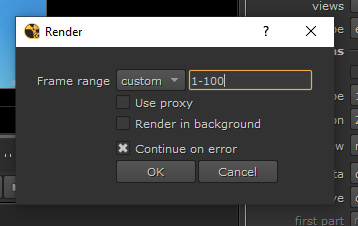
I made sure the frame rate was 25 and then clicked the render button. This opened another menu, which allows me to decide which frames are rendered out. Since the composition is short, I only rendered out 100 frames.
This was a fun exercise to do in Nuke, as it introduced me to a lot of the processes I can use in future. From past projects such as the 3D Unit, I've learned that simple techniques can be used to achieve complex assets, which is the mentality I've been using more frequently.
Video:


Comments