Nuke - Planar Tracking
- Mar 5, 2021
- 7 min read
Updated: May 11, 2021
Now that I've had a quick tutorial in Nuke and am a bit more familiar with how the interface works and how to create simple animations with still images, it was time for me to try creating something with footage.
I once again followed a tutorial on how to track a moving part of a scene and add an image to it. The first thing I did was go onto Pexels to find a simple street-view pan.
Here's the one I found, which coincidently happened to be the same one used in the tutorial. This was the best one I found, as it's in real-time and not a slow-motion shot, which would make it far harder to work with.


Here are the image that are going to be tacked onto the wall as the camera pans by. There's a Banksy street painting and a transparent layer of grunge that will be placed over the top.


Now that I have all the assets downloaded, I set up a folder in the same way as I had for the previous project, and moved that assets into the media folder to keep them all in the same place. I then read in the street pan video, and made sure the project was in the correct formatting (1080) before hooking up the footage to the viewer and pressing 1 to see it in the viewing panel.
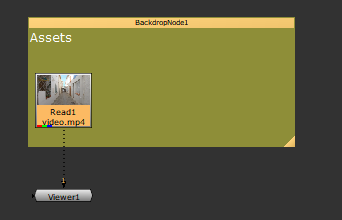
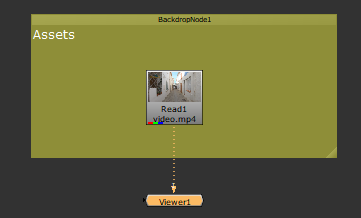


I added in a backdrop node and labelled it as 'assets.' This area will also be where the images will be placed later. I added a postage node with the original video selected, which creates a copy of it that can be edited.


I added a reformat node to check the formatting of it, which thankfully matched up with what I had already set the project as. I then wrote it out as a .tga sequence, which is a far smaller file type than .exr, what I used previously. I once again made a folder for all the frames, but I put it in media instead.


With that done, I put the postage stamp, reformat and write nodes into their own dackdrop node to separate them from the rest of the work I need to do in this project. I moved it off to the side and then added a roto node. This will be used to track part of the wall in the shot. I also changed what the viewer is attached to so that I can work in the correct part of the project.


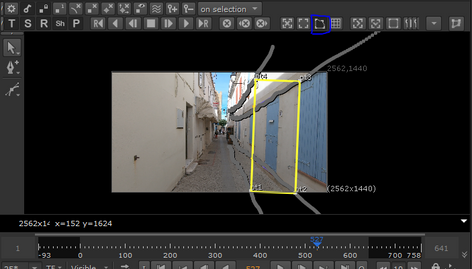
I double clicked the roto to open its menu and selected the 'Bezier Cusped' tool, which allows me to draw and create shapes on top of footage, which the software will then use to track it backwards and forwards.
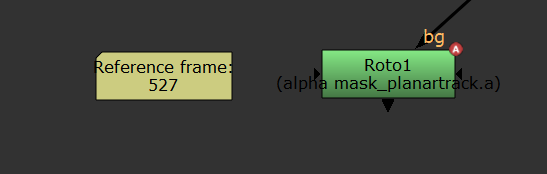
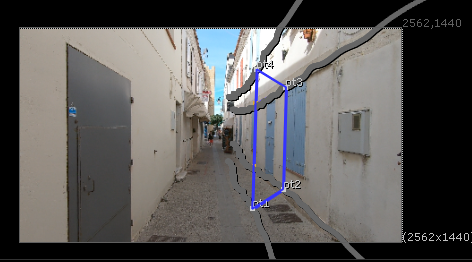
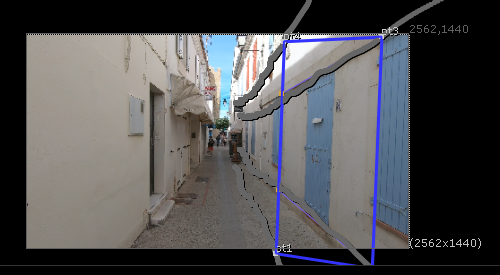
I started by outlining the four corners of the section of the wall I wanted to work with, and then adjusted it. I made note of the frame I did this on, which is the reference frame that I must use in order to make any changes to the composition. I noted this on a sticky note node.

Once I was happy with the placement of the roto, I tracked it forwards through the footage, before going backwards. This means the entire shot will feature this geometry for me to edit further.


I then added a planar track over geometry, but since it hasn't been matched up yet, it distorts as the footage plays through.

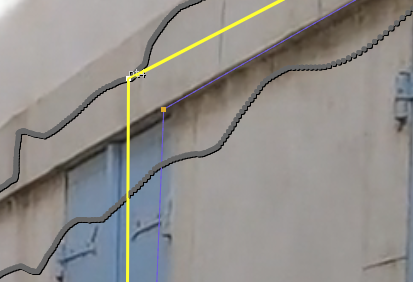
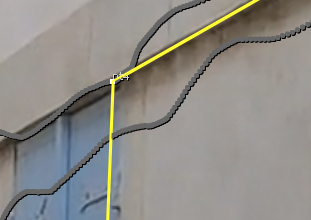


To fix this, I carefully matched up the planar to the original bezier cusp I'd created. I did this on the reference frame.


Here's how the planar looks now. It sticks to the wall throughout the footage, which can be easily seen when the grid is brought up. This also helped me make sure it lined up correctly with the wall.


With the planar complete, I added in a checkboard and attached it to a corner pin, which will feed into the roto. This is to check that everything has gone smoothly with the planar.

I hooked up the corner pin to the viewer, with showed the checkboard distorted in the same way as the planar had been, which means I can move onto inserting the image.


Before I did this, however, I did some quick reorganising and added in a merge node, which will merge the graffiti I'm about to implement with the original footage.


The next thing I did was read in the Banksy image. I swapped out the checkerboard with it, which means the image is now visible on the planar.

Part of the planar distorts at the end of the footage, so I shaved off about twenty frames from the overall composition to make up for this. I did this by adding a frame range node, which brings up the menu in the image above.


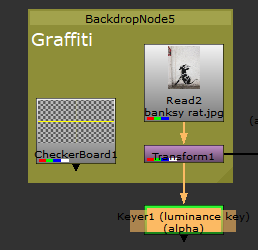
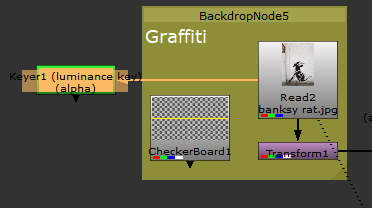
I organised the node graph some more before moving on, adding more backdrop nodes to the different sections. This includes: Camera Plate (postage node), Graffiti (Banksy image, checkerboard and a transform node), and Wall Planar Tracker (Reference Number, Roto and a Corner Pin 2D node).
The transform node attached to the image will be used to move the image around on the planar's surface area. The corner pin node connects the roto to the image, which is then fed into the merge node.


I sized the image down and moved it to towards the bottom of the planar to hide the bottom mud on the photo.


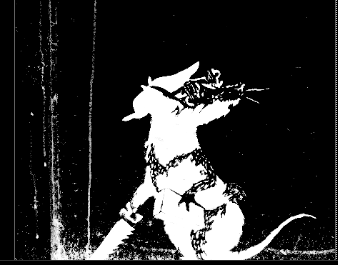
The next thing to do is to erase the background of the image so that it blends into the wall. I added in a Keyer node and attached it to the image. I then linked the image up to the viewer and viewed it through only the alpha channel, which will allow me to make the background of the image transparent due to the contrasting shades (black and white). I opened up the keyer menu and started adjusting the range.


When adjusting the range, I had to keep in mind that pushing the sliders too far would result in the edges of the image being incredibly sharp, which isn't realistic. I eventually settled on the bottom range, which I felt was a good balance.


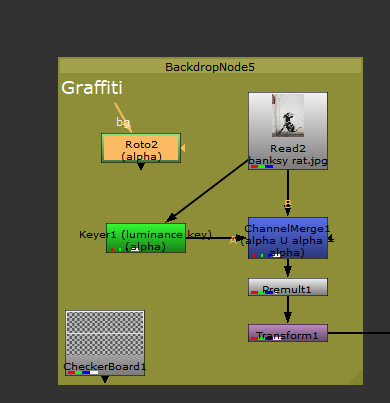
I added a channel merge node to combine the alpha channel to the rest of the composition.


I went back to look at the composition and saw that the image and saw that the white background was still visible. This was because I hadn't inverted the keyer node, which I did so after.

This is how the image looks now. Without the background it blends into the wall far better.


Because the node graph was starting to become messy and unreadable, I tidied it up by straightening any pipes I could, which makes everything far cleaner. I also a roto alpha node, which I'll use to mask out the mud and grime still remaining at the bottom of the image.


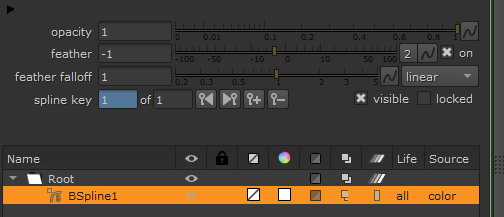
I use a B spline to outline the graffiti, which I did loosely the first time to get used to the tool. I made sure to outline the saw properly in my second attempt, which I adjusted before moving onto the next part.


This B spline will act as a mask for the grime in the image. By adding a merge node and setting its operation to 'in,' everything inside the B spline is visible.

Here's how the image looks without the grime.


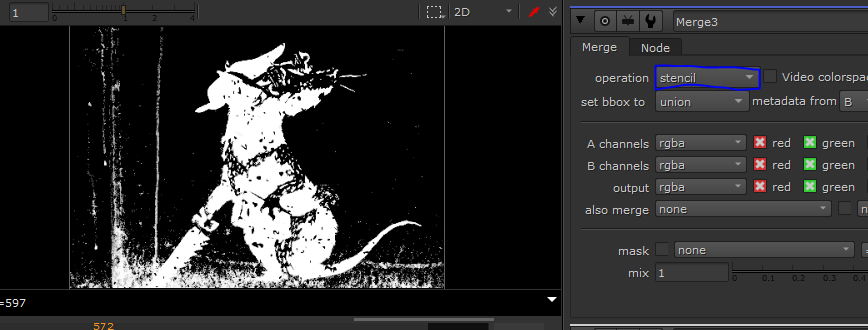
However, in the scene, it still looks a little too perfect, and something like this would have a few imperfections. So, I brought in the grunge layer, added in another merge node to add to the image, and set this one to 'stencil.' This makes it so that the grunge cuts out sections of the image instead of adding to it. The pipeline for the image is now getting long, so I had to make a few adjustments to the backdrop node in order to fit everything comfortably inside.


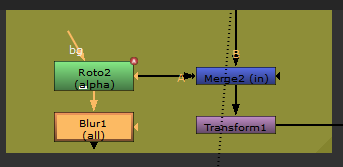


With the roto node the B spline is inside selected, I added a blur node in order to lessen the harsh edges of the image. I went up to 13 on the slider, which I felt was a good balance.


I also added in another blur on top of the image to match it in better with the sequence, which I placed between the transform node for the image and the corner pin node in the wall planar tracker.


Finally, before I rendered it out, I did some reorganising in the node graph to make everything easier to read. This includes making sure all the assets are in the assets backdrop node, and are connected with invisible pipes to the postage stamps. I also used a few dot nodes, which can be gotten by pressing '.' in the node graph. I used these to connect any of the pipes that were diagonal, which makes everything far more readable.
I also edited the backdrop node's sizes, which made everything look far neater as well. I then added in a backdrop for the write node, which is the final step.


I rendered out in .mov files, which takes up far less space and takes less time to render than .tga and .exr files. I created a new folder to put all the .mov renders in.
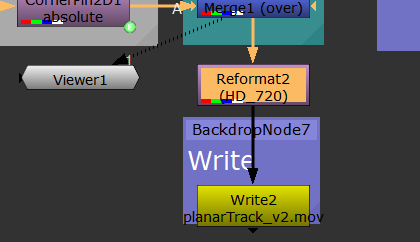


To put the video on Wix, I had to downsize it, so I added a final reformatting node to side it down to HD 720.
Here's the finished video. I think I did well following this tutorial, and was even able to take the initiative to use a reformatting node at the end of the pipeline to size it down. This tutorial was far longer than the last, but I feel that I learned a lot of different processes from this one.
I feel a lot more confident with Nuke now, and can see myself being able to make a new composition with a mixture of skills from both tutorials without much prompting.
There was a bit of warping at the end that I hadn't been aware of, so I cut the last few frames of the clip. Here is the final version above.


Comments