Rendering 3D Models in Maya and Unity
- Jan 30, 2021
- 4 min read
Now that all the models are complete and ready to be textured, rendering is the next thing to think about. Rendering can easily be done in Maya and other programmes.


The first thing I needed to do was open Maya and combine all my models in my revolver together so that I could move them around with ease. I then moved the revolver up to rest above the origin, and added in a large flat plain so that I could render something out.
However, without a light, nothing will render when I use the QuickTime Render tool, so I had to add in a quick light, which has attributes such as intensity and exposure. This light can also be disabled.


It was at this point that we all, as a class, collectively started playing around with lighting and rendering in Maya. I added another light, but used a spotlight instead of an area light. I played around a bit with the view, and as well as with the position and settings of the spotlight. Using Arnold Rendering, I was able to move my model around and see it rendered in the new position, which helped a lot with adjusting the light in the render view.


Another form of lighting a scene is to insert a HDRI image into the composition. A HDRI is a cleverly formatted image that can be turned into a sphere in some 3D software. To add a HDRI into Maya, the first thing I did was download one for free and then create Sky Dome sphere to apply it to in Maya.
However, the flat plane of geometry beneath the revolver is still visible in the render view, so I applied the texture called aiShadowMatte to it, which makes it invisible yet still capable of picking up on shadows.


The Sky Dome can also be turned off in the render view, but it's lighting will remain on the models. This is a good way to render out a frame and use in something like a still shot or Photoshop or digital painting.
The next step is texturing, so I applied some simple textures to my model. I applied aiStandardSurface to the entire thing, after deciding to just experiment with one material instead of several.

Here's a render of the revolver without any textures. Because of the invisible flat plane beneath it, there are shadows in the image as well. And since it renders with a transparent background, this could very easily be used in a digital painting or poster if it was properly textured.


It was now time to add some quick textures to the model to experiment further with rendering in Maya. I once again found a free texture to use online, so I brought it into Photoshop to create all the different textures I'd need for now: the diffuse, the metal, and the normal/bump maps.
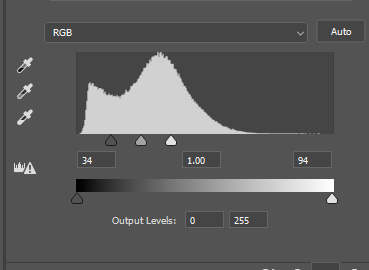
To create the metal map, I had to add an adjustment layer of black and white and increase the contrast between the two to create the map.


Here are the png versions of the textures I used. Since I already have UVs for my Revolver, I can easily apply them without any trouble.


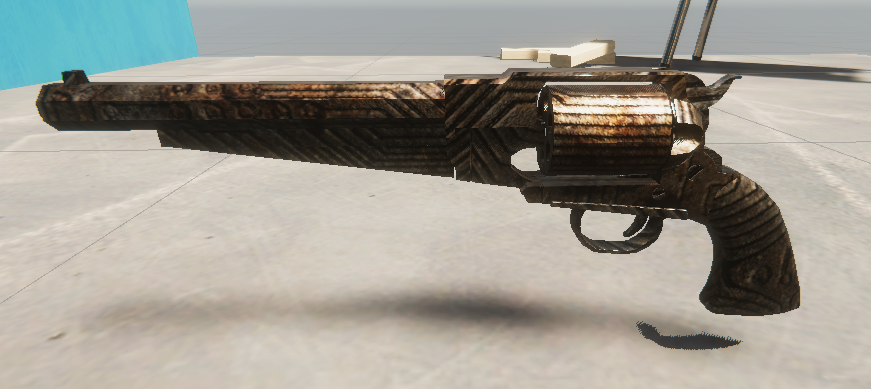
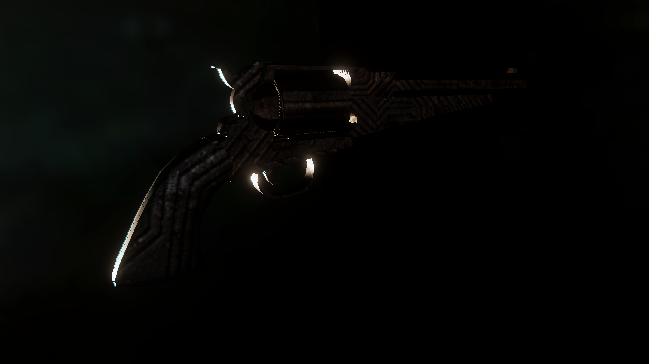
I first applied the diffuse to the model, and then the normal map, which gave it a lot of shine. I also played around with the aperture settings in the Arnold Render menu, which allowed me to play with the intensity of the light. This gave the revolver a more rusty, wild-western feel to it.


I tried to add the metal texture as well, but since Arnold surface textures are different than the ones standard with Maya, many different maps may be different. As such, applying the metal texture to a menu labelled 'metal' doesn't necessarily give the results it would normally have.


I experimented by putting maps in different places, but ended up removing the roughness/metal map all together in favour of a shinier revolver.


Here are several renders I snapshotted whilst playing around with the texturing.


Another engine that can be used for rendering is Unity, which is a game engine. To get my model into Unity, I had to save it as an obj file and create a new project in Unity. Once the new Unity Project had opened, I imported my revolver and its textures, and placed the revolver in the scene.


Once it was inside, I applied the textures to it, using the Base Map option. I then turned the metallic slider all the way up, which added a lot of shine to the model.


I then decided to play around more with the lighting, and moved the revolver out of the shade.


It's also possible to change the background of the Unity scene. To do this, I downloaded a cube texture map and turned it into a 3D object so that it could be applied to the skybox. I also got rid of the fog so that the entire box could be seen quickly.
I had a lot of fun just playing around with the various lights in the scene, and getting used to using the controls of Unity.

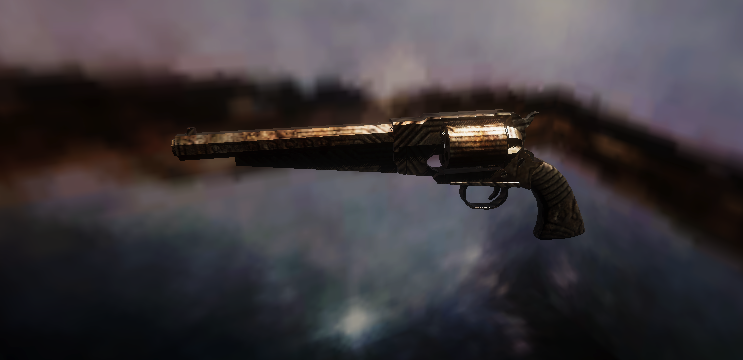


Here are some screengrabs I took of the revolver. I moved the lighting around a bit between images to test out how the textures looked in Unity.
This was overall a very fun experiment. It taught me a lot about applying textures and surface materials available in Maya. It also gave me a chance to become more comfortable with Unity, which is a game engine I hope to become well-versed in in future.


Comments