VFX - Portal Shot Part 3
- May 8, 2021
- 4 min read
Updated: May 13, 2021
Continuing on from where I left off last time, I had just gotten the card into a good place and decided to try and roto out the bottom of the door to sit more seamlessly in the scene. However, when I was applying the roto, it only showed the section of the image which I wanted to get rid of.

After asking for help and advice, I managed to resolve the problem I was experiencing with the roto. I replaced the copy node with a merge node, and set it to mask, which gave me the effect I wanted.


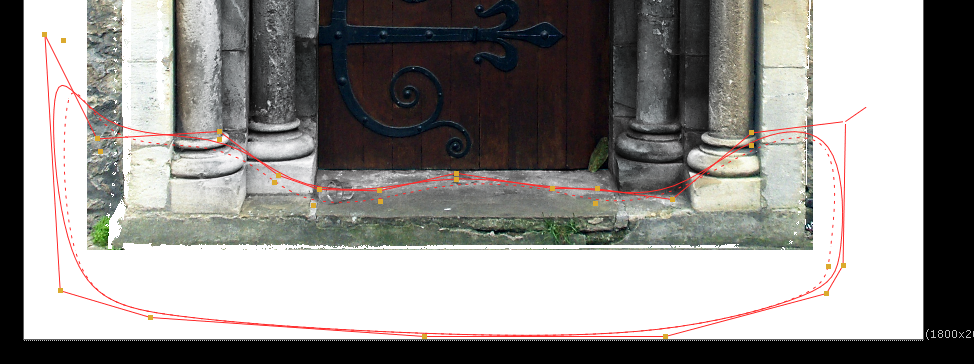
I played around a bit with the shape of the roto mask, and ended up extending it to cover more of the door's base.

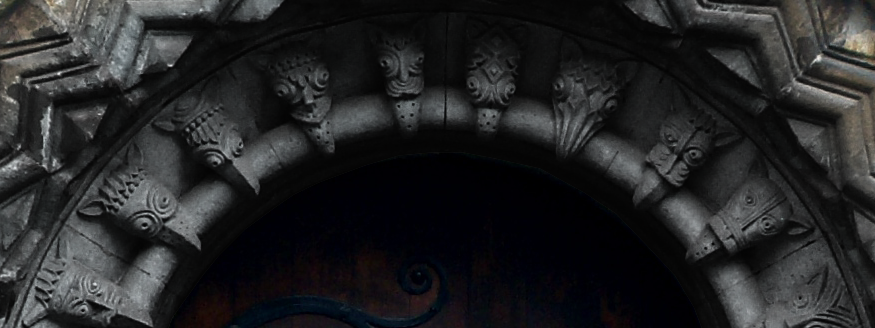
Here's how it looks in the footage. The door looks far more situated on the cliff now than it did before.


Once I'd resolved that issue, I got back down to readying the composition to be written out. I went up to the Lens Distortion node and copied it lower down, and then attached it to the Scanline Render node, which is where the 3D scene (the door) and the camera track funnel to.


I set the Lens Distortion node to redistort so that the footage is back to the way it was when I first began using it. I then moved the merge and write nodes that I'd set up at the beginning of this project down, and linked the Lens Distort to the merge node.


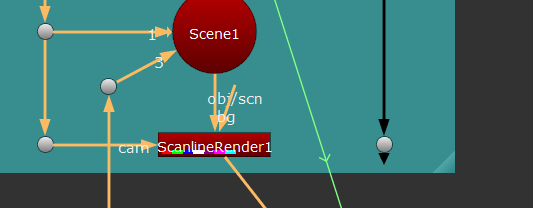
This would be the stage where I write out my project, but I ran into a problem with the pipeline. The footage was being brightened in the merge, and I couldn't figure out why. It turns out that there's two layers of the same footage playing over each other, which makes it look far brighter than it originally was. To undo this, I just have to disconnect the original Lens Distort from the Scanline Render node.


Unfortunately, doing this messed up the positioning of my portal, so instead of using this method, I unattached the second Lens Distortion and merge nodes and moved them off to one side. I then reattached the original Lens Distortion to the Scanline Render node, which set the footage back to normal.
From there, I linked up the write node to the Scanline Render node, which has everything I need to be able to render out my sequence, since my portal is in the centre of the scene and isn't visibly affected by the Lens Distortion.
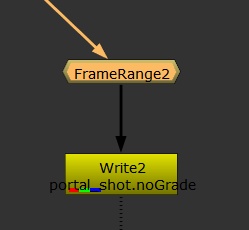


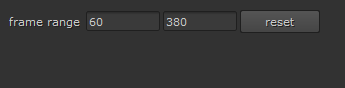
Before I wrote it out, I changed the frame range to 60 to 380. I did this because the tree at the start of the footage still clips into the door, and I decided not to roto it out. I then went into the write node and set the fps to 25, as it had been on 24.
With that, I read out the footage. Here's how it looks with the tracked points visible.


Once that had rendered, I decided to try and colour grade the door to match with the sequence. I had already been given feedback that the door already matched closely with the footage, but I wanted to try it out to see if the result is better. I started by adding in a Grade node in between the merge and the postage stamp I have of the door.

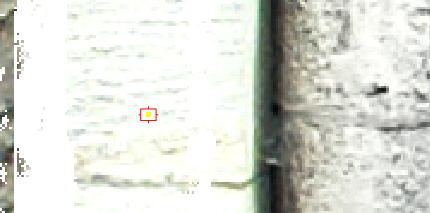

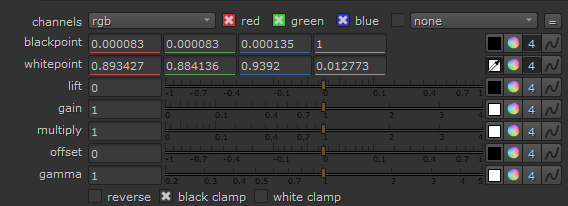

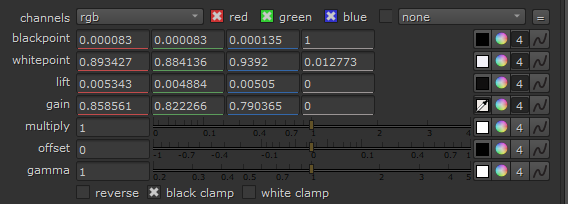
With the door in the viewer, I selected an eye-dropper in the Grade menu and searched the image for the darkest point. Colour Grading works by selecting the darkest and lightest points of two images (or in this case an image and footage), and then the software looks at them and corrects one of them. It determines which one is being altered by looking at the blackpoint and white point. These two are then balanced by the lift and gain, which comes from the footage.


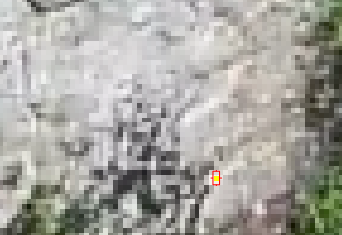
It was a lot harder to find the darkest point of the footage, as there's a lot of foliage and the rocks are mostly in the sun. I decided on a dark patch behind a rock. For the gain, I found a light point on the cliff face, and went with that.

With that down, I rendered out the colour graded footage.
Here is how it looks. The door seems far more situated in the scene because of how the colours have been changed to blend in.


Here's a closer comparison of the door with and without the colour grading. The one of the left is the original image, and the one of the right is how it looks after being colour graded.
Here is the rendered footage of a door with no colour grading or tracking points.
Here is how the colour graded door looks without the tracking nodes.

Since I made various different renders in quick sucession, I made sure to have naming convententions, such as noting down whether or not the renders had been colour graded or tracked.
I am happy with how my project looks, and now I just need some peer revision to see if there's anything else I could add or change about the composition. I am not entirely sure that I like the colour graded version of the door, as it doesn't seem quite right, but I will leave this up to peer revision unless I think of an easy way to fix it.


Comments