Creating a 3D Scene with Nuke and Maya - Part 2
- Dec 13, 2021
- 2 min read
Going back into Nuke, the next thing I did was add in a cube in the place that I want to put my plant in the final render.


I made sure the cube was level with the workbench and lowered the amount of subdivisions that the cube had.

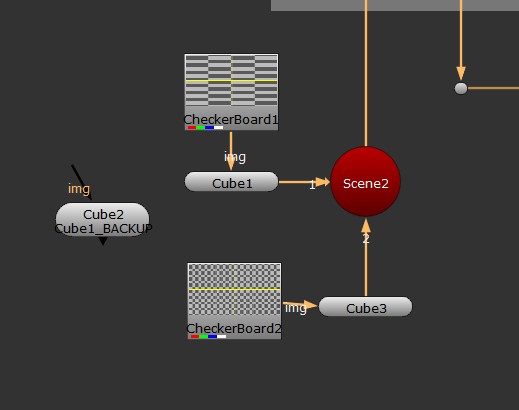


I also added a checkerboard to it and stretched out the texture to fit the cube. I then cleared up the Node Graph but adding in some backdrop nodes to contain the different part of the project, which will make it less confusing if I ever come back to edit this.

Here is how the scene looks with both the cube and workbench visible.
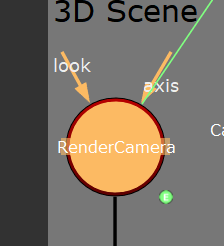


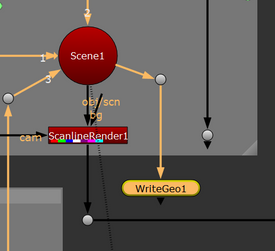
Selecting the camera, I renamed it RenderCamera, as this is where the rendering will be coming from, and I need to easily remember where that is. I then selected both of the 3D assets and then created a Write Geo node that will export the 3D assets into Maya.

I started by exporting the 3D Assets.
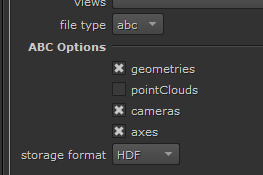
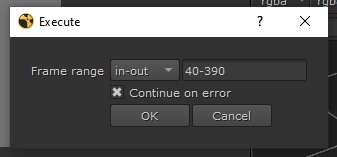
I deselected the pointClouds option, since I didn't end up using a Point Cloud, and then exported out all the frames that I will be using for the VFX shot.

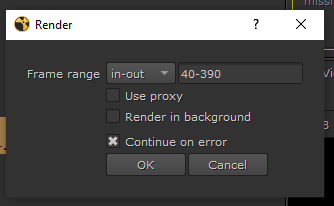
I then exported out the frames of the footage as jpegs, which I will use in Maya as well as an image sequence.


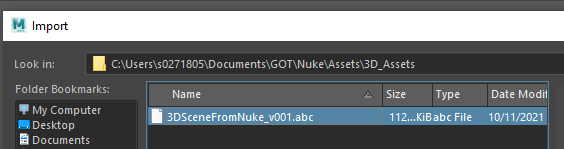
I then opened Maya and created a new project file near the NUke file so that I can easily get from one to the other in future. I then imported the 3D Scene from Nuke.


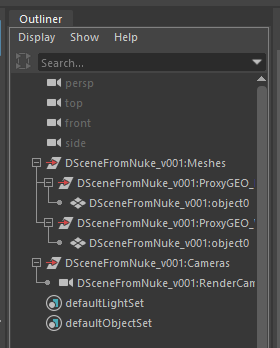
In the Outliner, there is the Render Camera, which also came from Nuke.


I did some repositioning of tabs in Maya, changing four tabs into two; one using the Render Camera, and the other kept as the basic Maya editor.


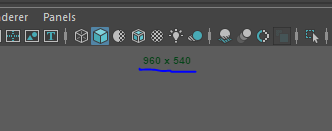
In the Render Camera view, I turned on the Gate Mask, which will show what the camera can see with the correct resolution. Currently the resolution doesn't match up with the footage in Nuke.

To change this, I went into the Arnold Renderer settings tab, nad changed the Image Size Preset to HD_1080.
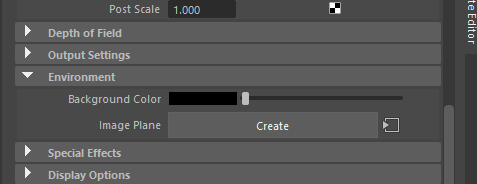

I then went into the attribute editor for the Render Camera, and created an Image Plain using the image sequence of the footage from Nuke.


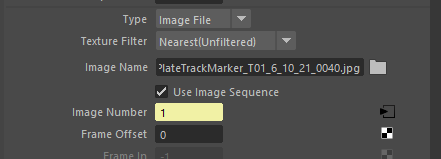
I made sure to select that it was an image sequence, so that I'll be able to play it back in Maya when I add in my plant later on.

In the timeline at the bottom of Maya, I can input the beginning frame (40), and the ending frame (390), that I had shortened the footage to before.

Here is the image sequence currently in the scene. It's too small and in front of the Proxy Geometry.

To fix this, I changed the depth to 1500.

The footage is now the correct size, and is sitting behind the geometry. This means I now have everything in place to import my plant asset to render, which will be my next task.


Comments