ZBrush - Sculpting a Plant Part 3
- Dec 20, 2021
- 2 min read
Continuing on with sculpting, I still had quite a bit of work to do.


I started by finishing off adding the thorns to the connecting stem.


I had a bit of trouble positioning and rotating some of the thorns, since I had some of the thorns veering round the stem to make it look more natural.


Here is the finished connecting stem with all the thorns added.
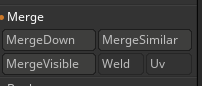


I then merged all the thorns on the right side together like I have with the pervious groups of thorns.

I then imported and mirrored the thorns, which now means that every inch of the plant is covered in thorns like I designed.


I then went back to the flowerbud to add more detail. I wanted the bud to look more like it had opened, so I used the inflate tool to build up some areas of the back.


I then went in with a smaller brush to emboss some detail of the leaves onto the back of the bud. This bled through onto the front, since the geometry is so thin. I managed to smooth this out a bit, and then engraved matching leaf markings faintly onto the other side.

Here is the finished flowerbud, which will later connect to the stem and the flowerhead.


I then added the same kind of detail to the back of the flowerhead, since the backs of the petals are visible through the flowerbud.


I then used the thorn to create teeth for the mouth of the flower.


I then duplicated the flowerbud over to the 'eyes' of the flower, and replaced the old placeholder I had there. I then sized down the spheres I had to fit better.


This concludes my progress on sculpting a plant. My next tasks are to create a plant pot in Maya, and then think about how I want to texture my plant, since the colours will need to be natural to integrate better into the scene.


Comments